DIY Seashell Resin Art Coasters for Beginners
Seashells in Resin Coasters are one of my favorite types of resin projects. Here, I came up with another resin project that is inspired by my recent trip to a lovely beach. The seashell design may be seen through the clear resin, giving you that beach vibes with just one look.
These coasters are simple to make and a stunning addition to any desk or coffee table. I wanted to remember my family time at the beach every day, so I made a simple recipe to create a set of resin coasters using some of my favorite seashells that we collected.
Supplies Needed
- Art Resin
- Coaster Silicone Molds
- Tweezers
- Gloves
- Mixing Cups and Sticks
- Sand
- Sea shells
- Other beach elements such as starfish and abalone shells
- Silicone Mat
- Respirator
- Quick Resin Dryer
Making the Seashell Resin Coasters
Many materials can be used with resin to create jewelry and home décor. I had a lot of seashells from our recent vacations that I had saved for future projects like this. On my dining table, you can see how imaginatively and patiently each of the seashell resin coasters was made, as well as how distinctive each is.
No need to worry if you have never used resin. It’s not difficult at all! To use resin as a medium, simply follow the instructions on the pack. Although Art Resin is fantastic, you must be ready to remove the bubbles with a heat source like a torch or a heat gun or by simply popping them with a toothpick.
Your seashell resin coasters should be non-toxic if you combined and properly dried the resin and measured the components according to their recommended ratios.
Resin is not prone to breaking or chipping when it has dried and grown robust. Your DIY seashell resin coasters can be used for a long time if they are well-maintained and looked after. Resin coasters may withstand intense heat for a brief period.
Hand washing your Seashells in resin coasters is also preferred. Your coasters may become distorted by the heat from the dishwasher.
You can also add some color to your epoxy, or you can simply paint on the shells directly—it’s completely up to you how you decide to decorate your beautiful coasters.
Let’s begin to create our resin seashell coasters!
Measure and Mix the Resin

In two mixing cups, measure the resin and hardener amounts. It is exactly a 1:1 ratio for this resin, then pour the two components one at a time into a cup and carefully mix for three minutes. Stirring slowly will reduce bubbles. Stir the resin for two to three minutes before pouring it into the silicone mold. This particular mold takes 100mLs of resin total. So I will need to mix 50mL or part A and 50ml of part B.
As soon as you pour the resin in, the cup marks become very difficult to see, so be sure to mark your desired levels on the cups with a marker pen.
Pouring into the Mold and Decorating your Coasters
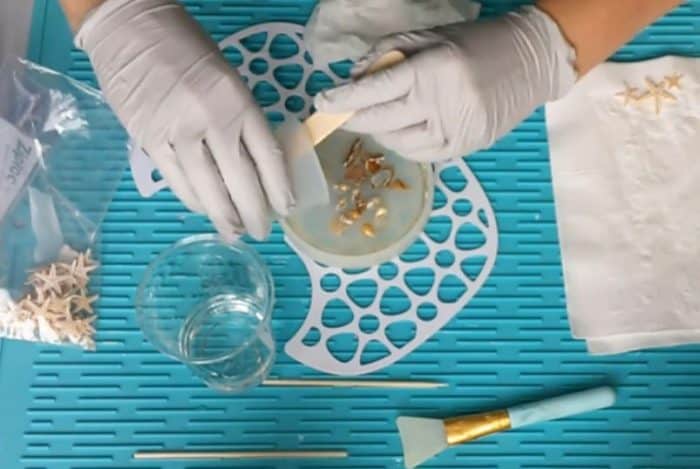
Start pouring your resin mixture into the silicon mold. Put one small seashell into each mold using tweezers or gloved fingers. Place them on the coaster facing down, keeping in mind that you are working from the backside.

Take your time; you have around 30-45 minutes to arrange your seashells before the mixture hardens. Since the mold will be turned upside down, make sure that none of your seashells protrude over the edge. You don’t want your table to be scratched by an uneven coaster or something sharp. Fill the seashell coasters with resin.
Press each seashell into the resin and allow it to set. You can also add some sand or other beach elements, such as a small starfish. Feel free to add color, sparkle, and any other kind of embellishments you need.
Try drizzling it all over to ensure that it reaches every crevice. Because the shells may float, I leave a little room at the top for the 2nd pour. This will make sure all the shells have a smooth finish and do not protrude through the back of the mold. Ensure a level surface for the coasters. While they are curing, cover them to keep dust from accumulating on them.
Popping the Bubbles
Little bubbles will start to emerge in the coasters five to fifteen minutes after the resin has been poured. These are normal and part of the procedure. To let the bubbles out, softly exhale over the coaster’s surface. You can pop the larger bubbles with a toothpick. Any trapped bubbles close to the shells can be removed using a heat gun.
Using the Fast Resin Curing Machine
I put the mold in my fast curing resin machine. It is such a lifesaver. The resin in the mold was cured in 2 hours. I was then able to pour a small amount of resin to the top of the mold and recure for another 2 hours. With the fast curing resin machine, this project would have taken me over 12 hours instead of 4 hours to cure.
Unmolding and Curing
When you’re happy with the way your shells look, go ahead and allow the epoxy to set. If not using a resin curing machine, give the resin 12-24 hours in a quiet location to cure. When the resin is tacky or not fully dry and has a slightly sticky feeling, you will know it is fully cured.
Admire your effort after carefully removing the coasters from the mold. If any resin has been overpoured, cut it off with scissors and smooth the edges if necessary.
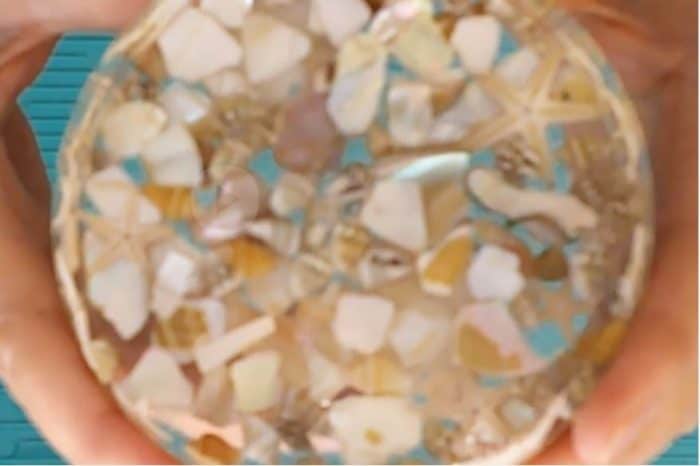
Enjoy your freshly crafted, personalized coaster once the resin has fully hardened. I adore how every coaster comes out slightly differently! Use it to decorate your home or give it a memorable present. The ability to personalize the coaster to your preferences is one of the good things about these coasters and this process.
In Conclusion

Seashells in resin coasters are a lovely and elegant way to give your house a relaxing beach feel. Did I mention that they are also wonderful presents? As you can see above, they need only a few simple materials to build, yet the results are beautiful.
All the materials required for this project are available at your neighborhood craft shop or via the link at the top of this article. The procedure itself is not that difficult, although it takes a while. Most of the project is accounted for by the resin’s dry time.
However, the outcomes are astonishing, and they endure for years.
DIY seashell resin coasters are indeed a wonderful way to show off your beach finds and savor your memories each day.
If you would like to see another favorite coaster that is easy to make, check out my Confetti Resin Coasters.