Print and Cut Heat Transfer Vinyl
One of the great benefits of having a Cricut Maker or any other Cricut Machine is the print and cut feature. I know other vinyl cutting machines have this option, but I have not used them and will be showing you how I use my Cricut Design Space to print and cut a special heat transfer vinyl onto t shirts.
It is only a few basic steps to follow and you will be creating great gifts for friends and family. This tutorial is also available on my youtube channel along with many other videos.
For this project, you will need the following:
- Print and Cut heat transfer vinyl
- Heat press
- parchment paper
- teflon sheet
Designing your Print and Cut HTV Vinyl
Find a design and save it to your computer. I used a very basic shaped design that would have very little intricate cuts to the htv vinyl.
Upload the design to Cricut Design Space. I then hit the complex choice under “Image Type”.
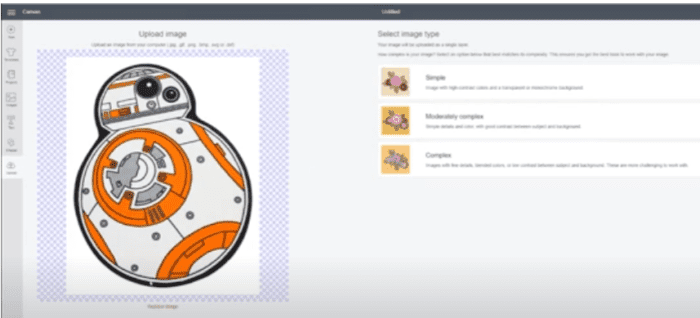
Once the new screen pops up, I then click select and erase to get rid of the background. Once you hit continue, you can name the design. We can now select design and click insert on our cricut design space.
The maximum design at the time of this article is 9.25 inches by 6 .75 inches. You can easily drag the arrow on the bottom right side of image to resize. I make my design for shirts as large as possible to avoid wasting excess material on the vinyl sheet.
Next we will click “Make It”, DO NOT MIRROR. I always make sure that I have the “Bleed” selected for my designs. I have the cut settings set at “Iron On”. Make sure the bleed is on. Make sure the right printer is selected. Then click print, no need for any other special settings on your printer. I use an opaque printable heat press vinyl.
Once your vinyl is printed, it will have a square box around your design. These are registration marks.
Cutting the Heat Transfer Vinyl with the Cricut
The mat that I use is a very old and worn green mat. I think the best mat for this project is the blue one that has minimal stick to it. Place the vinyl material on the mat. Make sure none of your rollers go over the design. You can just move them out of the way.
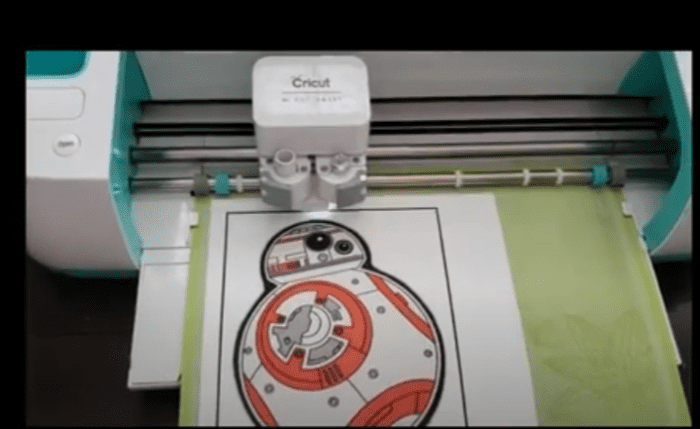
Click load and the Cricut will read the registration marks on the vinyl.
Once your cutting is done, you can carefully lift the vinyl off the carrier sheet. Weeding is usually pretty easy and simple. Lift the design off the paper.
Heat Press the Print and Cut Vinyl to Materials
The heat press that I use is the Cricut Easy Press. I will take the shirt first and prepress with moderate pressure to get the moisture out of the shirt. I will then let the shirt cool slightly because once you set the printed vinyl on the shirt, it can curl up it too warm.

Place the vinyl on the shirt that is now sitting on teflon pad or towels. This vinyl also comes with parchment paper, but I also use a teflon sheet to protect the shirt.
Set the Easy Press at 240 degrees for 15 seconds with moderate pressure for this heat transfer vinyl. The vinyl is a peel warm. Run your fingers around the vinyl on the shirt. If you feel a ridge, than I would repress. This keep the HTV vinyl from peeling up in the future.
Once the shirts cool down, the project is ready. Make sure you wash the garment inside out to help keep the colors vibrant.
I hope this project gives you some inspiration for some great crafting gifts with your Cricut. We have many more more HTV vinyl projects on our site.