One of my favorite kinds of resin projects is a beautiful picture frame decorated with seashells. In this article, I will show you how I created a new resin beach art piece that was motivated by my most recent coastal trip.
You can see the seashell design through the resin, which instantly makes you think of the beach. Any home or even restaurant can benefit from this simple but stunning sea glass resin artwork. I prepared an easy procedure for creating a dark blue wave sea glass resin art using some of my favorite seashells that I had collected since I wanted to constantly be reminded of the valuable time I spent at the beach.
Making the Picture Frame Sea Glass Resin Art: Dark Blue Wave
Resins are frequently utilized as coatings, construction materials, and adhesives when a solid binding is needed. Even home decorations, appliances, and jewelry are made using them. I decided to make something out of the numerous seashells I had preserved from our most recent vacations for fun activities like this.
If you have never used resin, don’t worry. It’s not at all challenging. Simply follow the instructions on the package to use resin as a medium. Although Art Resin is fun, you must also be prepared to pop the bubbles with a toothpick or another heat source, such as a heat gun.
If you appropriately mixed and dried the resin and measured the ingredients following their prescribed ratios, your sea glass resin art should be non-toxic. If properly cared for and maintained, your DIY resin art will last for a very long time.
It is entirely up to you how you choose to embellish your resin artwork. You can paint directly on the shells or add color to your adhesive.
What are we waiting for? Let’s be creative and make a dark blue wave sea glass resin art!
Supplies needed:
- 8 x 10 inches size Picture Frame
- E6000 industrial glue
- Art Resin
- Mixung cups and sticks
- Pair of Gloves
- Crushed Glass
- Sand Dollars
- Small Star Fishes
- White Sea Glass
- Regular Shells
- Abalone Shells
- Slay Blue Resin Pigment
- Heat gun
- Silicone Spatula
Prepare the Picture Frame
Take the picture frame apart by removing the back piece and carefully lifting the glass. Set aside the back part of the frame and clean the glass. Get the E6000 adhesive and run it along all of the edges of the frame.
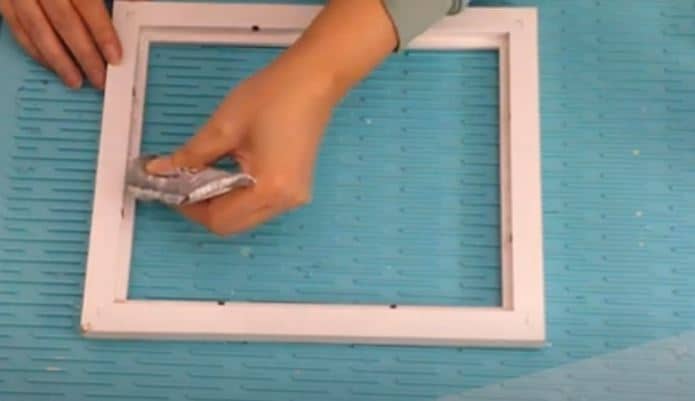
Once all of the edges have adhesive, place the glass over and let it dry for several hours. To add extra protection and to ensure that the glass will not fall out, put E6000 adhesive over one more time. Wait until it all dried up. Once dry, flip the frame over and place it on the container to set it up and get things started.
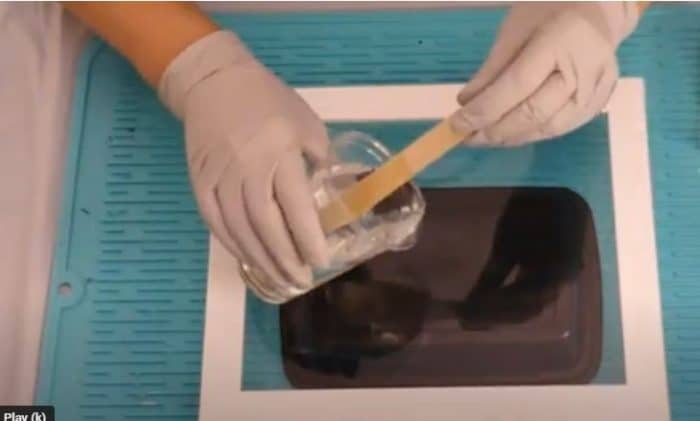
Measure and Mix the Resin
In two little cups, measure the resin and hardener amounts according to the instructions in the package. It is exactly a 1:1 ratio for this resin, then pour the two components one at a time into a cup and carefully mix for three minutes to get 150 ml of art resin.
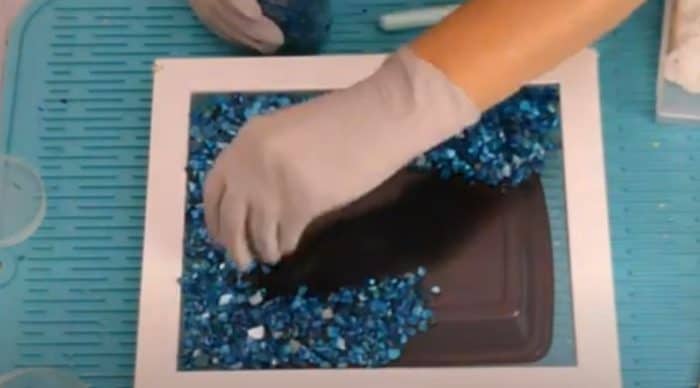
Pouring the Resin into the Frame and Start Decorating your Sea Glass Resin Art
Begin to pour your resin mixture into the glass of the frame. Make sure to evenly distribute the resin. Using gloved hands, carefully tilt the frame in the direction of your choice to make sure the resin has coated the entire glass surface. Five to fifteen minutes after the resin has been poured, little bubbles will start to form in the glass.
They are typical and expected of the process. You can use a toothpick to pop the bubbles to release them. Use a heat gun to release any trapped bubbles that are near the shells. Once the resin has been spread out evenly and all the bubbles are popped, put the bits of dark blue glass over the resin carefully.
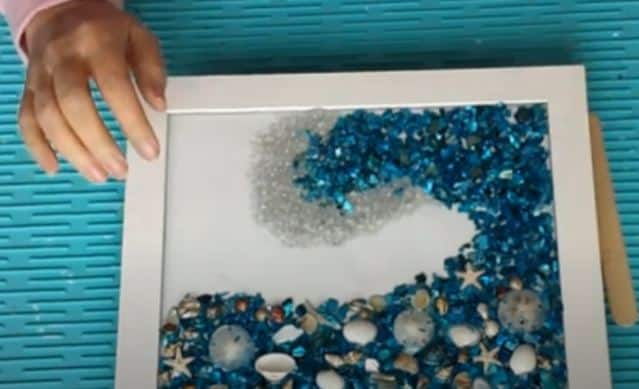
Continue arranging the pieces of dark blue glass until they formed a big blue wave. After that, you can randomly arrange the starfish and various kinds of shells on the blue wave glass. Place them in the order you desire. Take your time, and feel free to add any additional accessories you like, including color and shine. Before the mixture solidifies, you have around 30-45 minutes to arrange your seashells.

Use a silicone spatula to reshape the blue glass and seashells as they drip off a little bit while you fill them over with the remaining resin. Each element should be pressed into the resin, then let dry for about 12 – 24 hours.
Time to marvel at your custom-made, newly-crafted dark blue wave sea glass resin artwork. You can use it to adorn your home or give it as a special gift to someone important in your life. One of the perks of this is that you may customize it to your liking. Share this valuable learning with your loved ones or use the same method to create a different design.
In Conclusion
Framed Seashell resin art is a beautiful and elegant way to add a soothing beach vibe to your space. These are fantastic gifts for your significant others, as I already mentioned above. As you can see, they simply need a few basic items to create something amazing.
Your nearby DIY shop has every item you will need for this project. Although it takes a long because of the resin’s drying time, the process itself is not very difficult. Nonetheless, the results are astounding and last for years.
An excellent method to display your beach treasures and enjoy your memories every day is to make your seashell resin and place it in a picture frame.