
Looking for a quick St. Patrick’s Day gift? This DIY shamrock mug starts with a plain glass beer mug from the dollar store and takes about 10 minutes with a Cricut and adhesive vinyl. I’ll walk you through designing the curved “I Like To Paddy” text in Cricut Design Space, cutting it, and getting vinyl to stick well on glass.
As an Amazon Associate I earn from qualifying purchases. Some links in this post are affiliate links, so I may earn a small commission at no extra cost to you.
Supplies You Need
- A glass beer mug (mine was from Dollar Tree)
- Cricut Explore Air or other Cricut machine
- Oracal 651 permanent vinyl in green
- Transfer tape and a scraper
- Weeding tools
- Rubbing alcohol and a soft cloth
Step 1: Find a Shamrock Image
In Cricut Design Space, click Images and type “shamrock” in the search bar. You’ll find lots of options. Some are free and others are included with Cricut Access. Insert the one you like and set it off to the side while you add text.
Step 2: Add and Curve the Text
Click Text and type the top line. I chose a brush-script font for a fun, festive look. Make all the pieces the same green, then use the Curve tool to arc the top line slightly so it hugs the shamrock. Add a second text box for “Paddy” below the shamrock.
If the curved words don’t sit exactly where you want, click Ungroup and nudge the letters or words by hand. Don’t over-finagle. A little movement goes a long way.
Step 3: Size It for Your Mug
Measure the flat area on your mug. On mine, the design could only be about 3 inches wide, so I kept everything around 3 by 3 inches. Then select all and click Attach. If you skip this, Design Space will scatter your shamrock and words around the mat when you click Make It.
Step 4: Cut and Weed
Since this is adhesive vinyl going on glass, you do not mirror the design. Load your 651 vinyl, cut, and weed away everything except the design. Take your time with the small pieces inside letters.
Step 5: Apply to the Glass
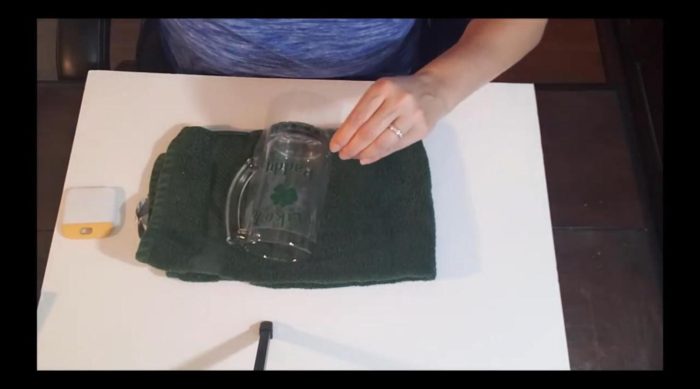
Clean the glass with rubbing alcohol and let it dry completely. Lay transfer tape over the weeded design, then place it on the mug starting in the center and smoothing outward. Peel the transfer tape back slowly at a sharp angle. If a small piece doesn’t want to let go, press it down with your scraper again before peeling.
If one section gives you trouble, you can cut it apart from the rest of the transfer tape and work on it separately.
Tips for Vinyl on Glass
- Dry, dry, dry. Even a little moisture after washing can keep vinyl from grabbing. This is the most common reason vinyl lifts on glass.
- Expect it to take a little longer. Oracal 651 works well on glass, but it may need more pressure and patience than on a coated mug.
- Your transfer tape matters. If your tape grips too hard, the vinyl may want to stay on the tape.
- Hand wash only to keep the decal looking great.
Frequently Asked Questions
What vinyl is best for glass mugs?
A permanent adhesive vinyl like Oracal 651 is a good choice.
Do I mirror vinyl for a glass mug?
No. Adhesive vinyl is never mirrored. Only iron-on vinyl needs mirroring.
More Quick Vinyl Gifts
See more ideas in my easy Cricut adhesive vinyl projects roundup, and learn the tools used here in my Cricut Design Space beginner guide. Subscribe to All DIY Crafts on YouTube.