
What happens when you combine a glitter tumbler with a mica powder design? You get the sparkle of glitter and soft, watercolor-like color on top. In this tutorial I’ll show you my Tack It alternative glitter tumbler with mica powder, made as a gift for a nurse friend who trains rescue dogs, finished with a puppy waterslide and her name in vinyl.
As an Amazon Associate I earn from qualifying purchases. Some links in this post are affiliate links, so I may earn a small commission at no extra cost to you.
Supplies You Need
- Stainless steel tumbler and white spray paint (I used Krylon)
- Loctite 100 spray adhesive and medium glitter
- Rust-Oleum clear sealer (semi-gloss)
- Stardust micas in blue, pink, and purple
- Rubbing alcohol, droppers, and small mixing cups
- Waterslide paper
- Tumbler epoxy, tumbler turner, and silicone brush
- Cricut and foil or Oracal vinyl
Step 1: Glitter With Loctite
Clean the cup with alcohol, tape the rim, and paint it white. Spray with Loctite 100, then set a timer. The usual window is 6 to 10 minutes, but in my warm room 6 minutes was the sweet spot. Touch the very end of the cup: it should be tacky, not gummy. Pour on the glitter and rub it flat with your fingers.
I go over the cup twice. If you hit a bald spot, you’ll feel the adhesive grab your finger. Respray those spots, wait again, and re-glitter. Seal with two coats of clear and let it cure (mine sat about 24 hours).
Step 2: Mix Cosmetic-Grade Mica With Alcohol
Because I also make soap, I keep cosmetic-grade, cruelty-free Stardust micas on hand. In soap making we mix mica with alcohol before adding it, so I tried the same idea here. I use little bath bomb molds as mixing cups because they sit flat and clean easily, and reuse plastic spoons from a frozen yogurt shop.
- Add a little alcohol to each cup, then stir in the mica until there are no clumps. That’s the most important part.
- For a darker color, add more mica. If it dries out, just add more alcohol and remix.
Step 3: Drop Mica Onto the Sealed Glitter
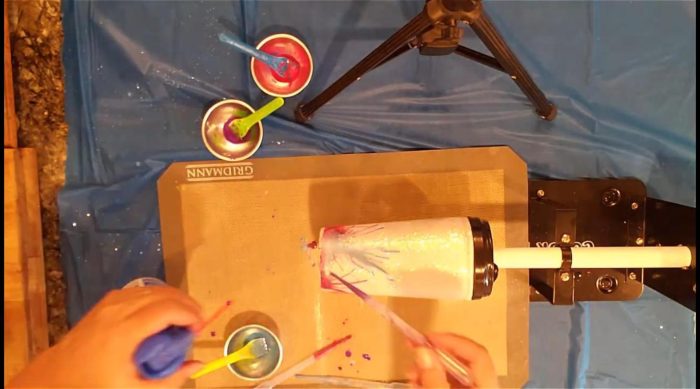
With the cup on the turner, use droppers to add each color where you want your design. A little goes a long way. If you don’t like a spot, it wipes off with alcohol, or even just water. Tip: raising the cup up higher gives you a better angle than reaching sideways. Seal the mica design before going any further so it can’t smear.
Step 4: Add the Waterslide and Vinyl
- I prepared the puppy image in Photoshop, printed it on clear waterslide paper, and sealed it with three coats of clear, letting each dry.
- In Design Space I typed the name in Quirky Script, closed the letter gaps, and welded it at about 4 by 1.5 inches, with “RN” in a block font beneath.
- I cut the name in a foil vinyl. Foils are pretty but tear easily, so weed gently. Apply the vinyl first, then slide on the waterslide and brush out all water and bubbles. Let it dry and reseal.
Step 5: Epoxy
I used 10 ml of each part and didn’t need any sanding with this medium glitter. With a silicone brush you can feel the surface: smooth means covered, and any rough patch needs more epoxy. Use a heat gun for bubbles. I don’t use a torch on this project, because mica mixed with alcohol and open flame don’t mix. Remove the tape after 20 to 30 minutes and let it turn for several hours. My mica stayed exactly in place.
Frequently Asked Questions
Can you put mica powder over glitter?
Yes. Seal the glitter first, drop on mica mixed with alcohol, then seal again before epoxy.
How long do I wait after spraying Loctite?
About 6 to 10 minutes, until tacky but not gummy. Warm rooms dry faster.
More Tumbler Tutorials
See my mica powder epoxy tumbler and Tack It alternative guide. Subscribe to All DIY Crafts on YouTube.