
One of my favorite gift ideas is a matching set: a bar of handmade soap and a tumbler in the same colors. In this mica powder tumbler tutorial for beginners, I’ll show you how I used the same Stardust micas from my soap to make a coordinating epoxy tumbler, then personalized it with an outlined holographic name.
As an Amazon Associate I earn from qualifying purchases. Some links in this post are affiliate links, so I may earn a small commission at no extra cost to you.
Supplies You Need
- Stainless steel tumbler, painted white
- Stardust micas (I used Stardust Pearl, Ariel Blue, and Green Lightning)
- ArtResin epoxy
- Tumbler turner
- Silicone measuring cups and silicone brushes
- Holographic vinyl and transfer tape
- Cricut
- Electrical tape, rubbing alcohol, gloves, a respirator, and a fan
Why Mica Matches Soap So Well
The soap I was matching used two main colors, but because they were swirled with a white opaque base, it actually looked like four shades. Using the very same micas on the tumbler made it easy to recreate that look. Stardust micas are cosmetic grade, so I already had them on my soap shelf.
Step 1: Light Coat of Epoxy
Mix your epoxy (I switched to ArtResin for this project). Put on a respirator and turn on a fan for ventilation. With the cup taped and turning, brush on a light base coat of epoxy.
Step 2: Add the Mica Colors
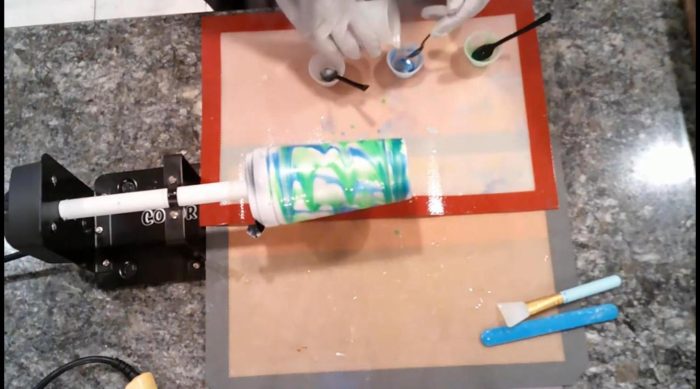
Mix each mica color and apply it to the wet epoxy while the cup turns. The pearl adds shimmer, while the blue and green create soft streaks that blend into each other, just like the swirl in the soap. Let the colors flow, and add more where you want deeper color.
Let the first coat cure fully before adding the name.
Step 3: Make a Name With an Outline
Holographic vinyl is beautiful, but it can get lost on a shimmery mica background. My solution is a thin outline, or stroke, around the letters. I create the outlined name in the free Phonto app (or Photoshop), then upload it to Cricut Design Space. The outline makes the name readable from across the room.
- Clean the cured cup with alcohol to remove fingerprints and oils.
- Decide where the name goes. I like names running vertically down the side, but horizontal works too.
- Apply the outline layer, then the holographic name with transfer tape.
Step 4: Final Coat of Epoxy
Wrap electrical tape a couple of times around the rim all the way to the top, wipe the cup with alcohol once more, and start the turner. Mix a fresh batch of epoxy and brush on the final coat.
Gift It as a Set
Once the tumbler cures, pair it with the matching soap in a small gift box. It’s a thoughtful handmade present for birthdays, teachers, or the holidays, and it looks like it was designed as a set, because it was.
Frequently Asked Questions
Can I use soap-making mica on tumblers?
Yes. Cosmetic-grade micas like Stardust work beautifully in epoxy.
How do I make holographic vinyl readable?
Add a thin outline around the letters, or back it with a solid color.
More Mica Projects
See my full mica powder epoxy tumbler guide and the glitter tumbler with mica. Subscribe to All DIY Crafts on YouTube.